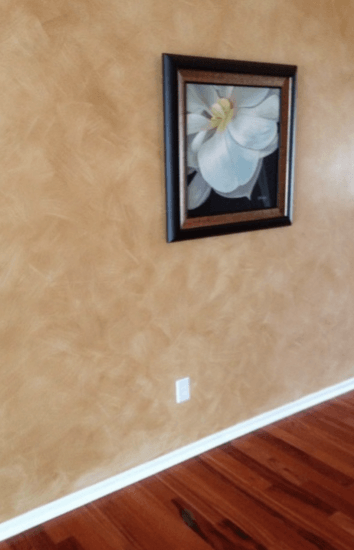
A good paint job is only as good as its materials. If you’re tempted to save a few dollars and buy the inexpensive paint, don’t give in! High quality paint will cover better, save you time, give you the results you’re dreaming of, and ultimately will likely cost less than if you grab the low grade paint.
Here is the scoop on why it’s important to only use top quality 100% acrylic latex paint in your home:
- Adhesion – Superior binding agents in high quality paints help them to better adhere to any surface.
- Camouflage – High quality paints can hide the previous coatings underneath, often covering in fewer coats – or even a single coat. They also cover flaws in the drywall, dents, filled nail holes, etc. better and more evenly.
- Spatter resistance – Good quality paint is formulated in a way that creates less spatter while it’s being applied.
- Seamless application – High quality paint goes on evenly, and brush marks or roller marks tend to even out as you go.
- Stain resistance – Top quality paints form a stronger barrier against soils and grime, preventing them from sinking in to the coating.
- Scrubbability – High quality paint can stand up to scrubbing, should you need to apply some “elbow grease” to go after a stain or heavily soiled area. Heavy scrubbing won’t damage the surface of a good quality paint.
- Mildew / mold resistance – If you’re seeking to keep mildew and mold at bay, there are paints that are formulated to do so, and high quality versions of such paints will be able to provide superior protection against such stains.
- Fade resistance – High quality paint is better at resisting fading, and here in Florida, that’s a big issue to consider! You’ll probably deliberate at length when choosing the perfect color for your home, so be sure that color will stay true, even in the blazing sun.
- Touch-ups – Top quality paint makes touch-ups less noticeable.
- Cost – The best quality paint typically covers in a single coat. When you’re calculating the cost of your project, it’s tempting to reach for the less expensive paint, but be warned that low quality paint will require multiple coats to achieve the same results as a single coat of high quality paint. Save yourself money and invest in top quality paint.
- Time – High quality paint that covers in a single coat will save you money and will save you time. After painting a room in a low grade paint, you’ll need to go back to your starting point and repeat the process several times to get the right coverage. If you use a high quality paint instead, you’ll likely only paint the room once!
The best – and possibly only – way to ensure you home is protected against the elements, looking beautiful inside and out, and didn’t cost you extra time or money is to invest in high quality paint and high quality materials, and have the paint applied by a highly-rated professional painting company with skilled artisan painters. That’s where we come in! The Painting Craftsmen is the best painting service Jacksonville FL homeowners trust for their painting projects. We are known for our quality, and that includes quality of work and the knowledge that high quality materials produce the results our clients want. Homes throughout Riverside Avondale, San Marco, downtown Jacksonville, and all along the beaches have received quality paint jobs from our skilled painting technicians. Call on us to make your painting project dream a reality!

Beyond transforming the appearance of your home, a fresh coat of paint offers vast protection against the elements, which is extremely important here in Florida. Here are some of the ways in which a high quality, professional paint application can protect your home:
– UV rays: We all know the importance of applying sunscreen to protect our skin from the powerful sunlight and UV rays. Without the proper protection, your home will also suffer damage and drastically fade due to ultraviolet rays.
– Mold and mildew: Mold and mildew are troublesome to many homes in the area, due to our warm, damp climate. Issues such as these can turn even the most beautiful home into an eyesore. If the paint on your home is not intact, a mold or mildew infestation can cause extensive damage by allowing moisture into the walls, encouraging dry rot and fungus growth, and causing structural damage to the house. Proper prep work is important in these cases, as paint alone cannot kill mold spores. You’ll need to thoroughly clean the surface, usually by pressure washing and including a chlorine based cleaning solution. After that, if further steps need to be taken, your exterior painting contractor will be able to recommend a great quality paint that is formulated with mildewcides to counteract future problems.
– Deterioration: Paint helps to seal into the wood all natural resins and other oils that might otherwise be weathered out. As time goes by, a hairline crack can appear in the stucco of your home, or a gash in a wood panel can become a large crack, allowing moisture in, and opening up the siding of your house to numerous problems. Paint provides great protection against such issues.
– Moisture and leaks: A painted surface slows the penetration of exterior moisture into wood. Here in Florida, we have high humidity year round, and rain and thunderstorms can be daily occurrences. When your home has received a high quality topcoat by a great professional painting company, you can rest assured that the corners are sealed, gaps are caulked, and your home will remain safe and dry, whatever the weather.
To protect your home against these elements really takes a three-pronged approach:
– First, the best paint must be selected. You can do your research, or you can call on a highly rated professional painting contractor to do the job, and take comfort in knowing that the professionals have already done the research for you. The best painting contractor will be an expert in any and all paints and finishes and will be able to recommend the best latex paint, stain, or other finish for your home.
– Second, proper prep work is critically important in protecting your home. Even if you select the best possible paint for your home, if you simply apply it over the mildew without first eradicating the source of the problem, your efforts are in vain.
– Third, you need to find the right team for the job. Some homeowners enjoy complex DIY projects in the hot sun. If you’re embarking on a house painting project, be sure to research the best paint for your home’s needs, the techniques that are right for your type of home, and set aside the time for the job. Note that certain exterior paint jobs require important but lesser known safety measures. For example, if you’ll be applying paint that contains mildewcides, you’ll need to wear a mask, safety gloves, and safety goggles. Alternately, many other homeowners prefer to find the best exterior house painting company in the area and trust the work to the professionals!
The Painting Craftsmen is the best painting company Jacksonville FL residents trust with their homes, and we’re the right company for your painting project! Our technicians excel at prepping and painting wood paneling, cedar shake, stucco, and all other styles commonly found here in San Marco, Riverside, Mandarin, Nocatee, and throughout the Jacksonville area. Our teams of exterior painters are trained extensively and have the experience that a complex, taxing job like this requires. The best thing you can do for your home is protect it from the elements and premature deterioration. That just happens to be our specialty. Call today and let’s get your home on our schedule!
Neutral paint colors are timeless, flexible, and easy to use. If you’re wondering whether neutral tones are right for your home, our tips can help!
Here’s when to use neutral paint colors in your room and home:
–You want to decorate with an accent wall. Crimson, magenta, turquoise, and cerulean are beautiful colors, but may create a bolder look than you’re going for when they cover every wall in the room. Instead, apply your bright, bold color of choice to an accent wall, and then cover the remaining walls in a soft gray or taupe.
–You’re not “good with colors.” If you’re one of the countless homeowners who claims to have no “eye” for color, neutral paint colors will save the day. Instead of fretting over innumerable shades of mauve, marigold, and burnt sienna, find a simple cream or beige and relax.
–Your home has a specific style. Is your San Marco home a Spanish Revival villa? Is your Mandarin home a classic Mid-Century Modern gem? Do you live in a historic Craftsman style bungalow in Riverside Avondale? Regardless of your home’s era and style, there is a historically-accurate neutral tone for every room in the house – and for the exterior of the house, as well.
–Your home has NO specific style. Most of us live in homes that are a mix of styles, eras, and design elements — and neutral tones are just as easy to use in these situations.
–You want clean and modern. Nothing says simple, streamlined, clean, and modern like a pale gray or an off-white with cool undertones.
–You want warm and welcoming. On the other hand, nothing is as welcoming and cozy as a warm, medium beige or soft cream.
–You want easy. Incorporating neutrals into your home is as easy as it gets. Your paint manufacturer of choice will have dozens of color choices. Simply grab a few paint swatches and start planning your painting projects! When you find a good painting contractor for the job, a great professional painter will be happy to help you pinpoint some specific tones and hues for your home.
Want some specifics in the meantime? Here are some of our favorite neutrals:
–Grays: Dorian Gray (Sherwin-Williams), Silver Strand (Sherwin-Williams), Pike’s Peak Gray (Benjamin Moore), No. 275 (Farrow & Ball), Fossil Grey (Glidden)
–Beiges: Cedar Key (Benjamin Moore), Featherstone (Benjamin Moore), Dhurrie Beige (Sherwin-Williams), Grassy Savannah (Behr)
–Creams/Off-Whites: Olympus White (Sherwin-Williams), Palais White (Behr), Marshmallow (Sherwin-Williams) Mountain Peak White (Benjamin Moore) No. 239 (Farrow & Ball)
There is nothing you can’t do with neutral paint! Take the guesswork out of your painting project by opting for neutrals, and take the worry and hassle out of the job by finding the best painting company in your neighborhood to do the work!
At The Painting Craftsmen, we pride ourselves in our skill, our keen eye for detail, and the training and experience to make each room in your house even more beautiful than you dreamed. Ask any of our clients throughout northeast Florida and they’ll tell you that we’re the best professional painting contractors in town and the company to trust with your project.
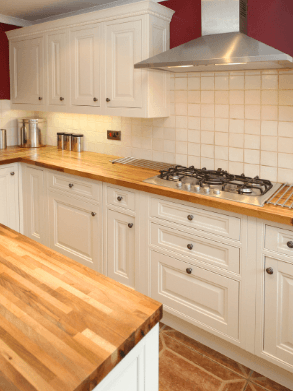
When your kitchen is in need of a facelift, the best thing you can do is to refinish the cabinets. Refinishing cabinets is the smart and cost-effective alternative to replacing them. When a change of this magnitude is in order, most homeowners choose to paint their cabinets. Here are our pro tips for making your cabinet painting project a success:
- Set aside time. First and foremost, make sure you allot enough time for your project. Cabinet refinishing and painting is a huge job, and for most homeowners, it is not a simple weekend project. You’ll need to set up, prep, paint several coatings (letting each coating dry), and clean up, all of which takes time and work.
- Make a plan. There’s a lot to do before you open the lid on your first can of paint. The first thing to do is make a plan for your project. For example, make a system for remembering which drawer pulls and knobs go to which drawers and cabinets faces, and for remembering the positioning of the cabinet faces themselves.
- Set up a workspace. In the kitchen itself, clear out as much stuff as you can. All dishes and silverware will need to be removed. You’ll also want to remove any freestanding appliances, or anything else that can give you more room to work. Out in the garage, set up a work table (or two).
- Remove hardware. Remove all knobs, pulls, etc., as well as their hinges. Put all hardware together and out of the way.
Make the surface as smooth as possible. Before applying any coating, you want to make the cabinet faces – and anything else that is to be painted – as smooth as possible. This means filling any dents and gashes with a good wood filler or spackle and giving all surfaces a good cleaning. Use an abrasive sponge to scrub away greasy fingerprints, cooking oil, and food spills. The cleaner and smoother the surface is, the better the coatings will adhere!
- Apply the proper coatings. You’ll want to start with a stain-blocking primer. Let the primer dry and lightly sand it after it dries. Follow with a coat of your paint of choice. If you select high quality paint, you’ll likely be able to cover the cabinet faces and boxes with only a couple of coats. If you opt for the inexpensive paint, you’ll probably need to do several more coats.
- Use the right tools for the job. Instead of paint brushes, use rollers. Specifically, use the Whizz roller covers for application.
- Give yourself plenty of ventilation. When working in the garage or outside at your worktable, this should be no problem. When working in the kitchen itself, however, be sure to have windows open, and keep children and pets in another end of the house.
- Have fun! DIY projects should be fun, and cabinet painting is no exception. However, if the job turns out to be too much, call on the best professional painting service in your area and let the professional painting contractors take care of your project for you.
Think carefully before painting your kitchen cabinets. This is a huge undertaking, even for highly experienced DIY aficionados. Cabinet refinishing is one of those home improvement tasks that is really best left to a great professional painting company. Save yourself the sweat, hassle, and mess, and just call the pros!
If you live in Northeast Florida, The Painting Craftsmen is the best painting service and the company to trust with your cabinet refinishing project. Cabinet refinishing is our passion, and we only hire experienced and highly skilled craftsmen for our team. Our craftsmen can create the factory finish of your choice and transform your kitchen into something you’ve only dreamed about! Homes throughout Ortega, Avondale, San Marco, Ponte Vedra Beach, and downtown Jacksonville FL know that for the best painting job, the only painting contractor to call is The Painting Craftsmen. Call today and let us get started on your project!
Before any big home improvement project, you likely do quite a bit of research, weigh your options, and spend time considering the pros and cons. Home improvement projects are big decisions, and you want to make the best choices you can for your home and money. Epoxy garage flooring is the easiest good decision you can make for your home.
Here’s why:
– It’s durable. Epoxy coating over your concrete garage floor creates one of the most durable finishes available. Epoxy finish is long lasting and resists considerable wear. After the epoxy is applied, it converts to a solid polymer, cures, and becomes incredibly strong. A finished epoxy garage floor is able to resist oils and other chemicals – even potent ones – that may spill. It’s easy to see why warehouses, factories, and auto shops of all kinds choose epoxy for their floors.
– It’s low maintenance. Epoxy garage flooring requires minimal maintenance, and enables quick cleanup of spills. Once coated in epoxy, the cement is sealed and no longer porous, meaning spills won’t absorb and cause problems for you later. Spilled chemicals and oils won’t require specialized cleaning agents, either; they’ll stay on the surface of the epoxy. Just wipe them up and move on!
– It’s safe. Epoxy coating resists slippage, extreme impact, and high temperatures, and is resistant to fire and water. It’s also shock resistant. There simply is no safer coating for your garage floor. Once sealed in epoxy coating, your floors are protected. You can drop sharp tools on it, stack heavy boxes on it, and of course drive on it, and it will look just as good as the day it was installed.
– It’s attractive. Epoxy flooring provides a professional and polished look to your garage flooring. When you apply epoxy flooring to your garage, you’re making it as elegant as a garage can get. The flecks of color that make up the the epoxy design are available in a vast selection of colors and pairings, so you can choose a combination of colored flecks to perfectly suit your garage, or match the style of your home.
– It’s perfect for your home. Regardless of what you use your garage for, epoxy flooring will only enhance it. Choose epoxy flooring for your home, and you’ll wonder why you didn’t do it sooner.
Epoxy garage flooring is the perfect fit for your home, and an easy decision for making your garage a safe, sturdy, and easy-to-clean workspace. The installation is a notoriously taxing DIY project, but if you’re lucky enough to have a good professional epoxy floor installation company in your area, then the decision just got even easier. The Painting Craftsmen is the epoxy floor service Jacksonville FL homeowners call on. We are excited about epoxy flooring and it shows – we’ve invested in the best equipment in the industry, as well as in the training of our employees, making us the best choice for your epoxy installation needs. Our technicians are skilled artisans with an eye for detail, while still efficient and hardworking. Homes throughout Atlantic Beach, Ponte Vedra, Riverside Avondale, and all Jacksonville suburbs are making the change to epoxy garage flooring, and you can choose the same for your home. Call on us, and we’ll get started with your free in-home estimate!
Planning your interior painting project is a big job. Most painting projects require some research, some budgeting, and a lot of decision making. You’ll need to decide on brand of paint, the types of sheen, and the particular hues for the walls in each room. The biggest decision, of course, is choosing the best interior painting contractor to do the job. Use our tips to find the best interior house painter for your home!
The interior painting expert you find should do the following:
1. Experience – It goes without saying that you want to hire a painter who has experience in the type of project you are planning. A painter should be trained in the safe way to use ladders and in the safe handling of all the equipment needed. Your painter should have extensive experience in the typical painting skills, including sanding and prep work, using rollers and all types of brushes, applying different custom finishes, if the project calls for it, and working with any and all types of house paint.
2. Knowledge – The estimator or contractor you meet with should be able to make recommendations about the materials that will work best for your project. Likewise, he or she should be able to make recommendations about color and sheen type, should you have any questions about that.
3. Portfolio – It’s a good idea to see pictures from jobs the painters have completed. Ask to see several examples.
4. References – A good painting company will have many happy clients! Ask to speak with some of these happy customers and get the real scoop.
5. Brands of paint – Find the interior painter who uses high quality paint, such as Benjamin Moore or Sherwin-Williams. Lower quality paints will not provide the best coverage and will dull and chip before long.
6. Awards – Great interior painting contractors will have awards from such institutions as Angie’s List and the Better Business Bureau. When looking for good painting companies, research their websites or call the company and find out what awards the company has received throughout the years. A great painter will also have been recognized by local organizations.
7. Bonded and insured – The painting company you hire should have all the proper documentation for general liability insurance and workers’ compensation insurance. After all, this protects the company and their employees, and protects you and your home, as well.
8. Formal estimate – The scope of the project should be outlined completely for you, including the materials that will be used, the colors of paint you have selected, along with a signed contract.
9. Knowledge of lead paint – Lead paint is a dangerous substance, and the protocols for dealing with lead paint are very strict. The best painting services obtain the training and certifications needed to handle and dispose of lead paint safely. If you live in an older home, particularly if it was built before 1978, you will want to have the home tested for lead and hire painters accordingly.
10. Customer service-oriented – A painting project can be a large ordeal. The planning, the color selection, the prep work, the finished product, and the cleanup can take anywhere from a few hours to several weeks. You want to be sure you hire and work with a painting service with excellent customer service.
There is a lot to think about and research when looking for the best painting company for your home. You need a company who you can firmly trust to give you the highest quality finished product, and outstanding customer service in every step of the project, from the initial quote all the way to the final cleanup. If you live in Jacksonville FL, The Painting Craftsmen is the trusted painting service and the company to hire for your own interior painting project. Our clients in Riverside Avondale, San Marco, Nocatee, Ponte Vedra Beach, and throughout Jacksonville know to call on us for a great service experience and a truly exceptional finished product. Trust The Painting Craftsmen with your home! You’ll love what we do!
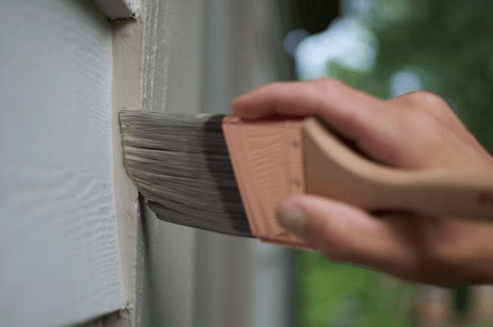
Crisp, beautiful trim, with clean, straight edges is one of the hallmarks of a truly great paint job. Homeowners who choose to tackle house painting as a DIY project often fear the task of trim painting, but don’t be afraid — our tips will having you painting trim like a pro!
What you need:
– Sandpaper (most likely 100-120 grit)
– Spackle and spackling knife
– Painter’s tape
– Sponges and clean cloths
– Dropcloth
– Paint trays, paint sticks, and brushes
– Paint (a high quality interior primer and a high quality interior latex paint)
Step 1: Clean
The first step in nearly every painting project is to clean the surface, and trim is no exception. Wipe away dust and cobwebs with a clean cloth, and wipe grime and buildup using a damp sponge. If you skip this step, the primer and paint may not adhere well.
Pro tip: When cleaning and prepping, as well as when painting, work from the top down. This will help you control the dust during the cleaning and prep work, and will allow you to paint over any spatter or spills that occur during painting.
Step 2: Sand
Sand all trim surface. Even if the trim is new, you may want to use a 120-grit paper or block to lightly sand down the shine. After sanding, use a damp cloth to wipe away the dust.
Step 3: Repair
Use a spackling knife to fill all gouges, dents, and cracks with a lightweight spackling compound. When the compound has completely dried, sand the area and again wipe away the dust.
Step 4: Tape
Use painter’s tape to mask off the wall. Use long pieces of tape (e.g. 6–8”), and use the spackling knife to press the tape firmly. This will prevent the paint from bleeding through the tape.
Step 5: Primer
Apply your primer to the trim. Allow it to dry for a full 24 hours. Once dry, if you see spackle, bare wood, etc., apply a second coat of primer to those areas.
Step 6: Topcoat
Apply topcoat, including a second coat, as needed. Pull up the painter’s tape before the paint has fully dried, in order to avoid pulling up flecks or chips of paint.
Pro tip: In order for your trim paint to stand out against the wall paint, choose a slightly glossier finish than the wall paint finish. For example, if your walls are satin, choose a semi-gloss for the trim, and if your walls are semi-gloss, choose a higher gloss paint for the trim.
The Best Painting Contractors Jacksonville FL
At The Painting Craftsmen, we specialize in interior painting, from the crown moulding to the baseboards, and everything in between! There is an art to painting, including trim painting, and our technicians are expertly trained in the techniques needed to achieve the best possible results, time and time again. Homeowners throughout the First Coast – from Fernandina Beach to Jacksonville to St. Augustine – know that The Painting Craftsmen is the best professional painting company and the team to trust with their homes.
Summer is a great time to paint your home’s exterior, giving it a boost in its aesthetic, and an important measure of protection against the elements. Whether your home needs to be painted from top to bottom or simply needs some refreshing, planning is required. Use our tips to plan a painting project that runs smoothly and leaves your home looking great!
- Set aside the time – Painting the exterior of your house is no small feat, so set aside time accordingly. For example, if you live in a large home and will be doing the painting all by yourself, don’t expect to complete the project in a single weekend.
- Check the weather – Check the weather report and plan accordingly. A rainy week will not work for painting your home’s exterior. Here in Northeast Florida, the heat and humidity can be intense, so try to hold off for a pleasant week in order to make the job go as comfortably as possible.
- Surface preparation – Make any necessary repairs to your house before opening the first can of paint. Replace rotted wood and rusted metal, reapply caulk, and scrape the old and chipped paint. You’ll also need to properly clean the surface before painting, typically by pressure washing, to make sure that any mold, mildew, insect infestations, etc. are gone before you begin painting.
- Paint selection – Exterior paint is specially formulated to resist mildew, retain color, and be flexible in order to withstand the expanding and contracting that comes with the weather. Paint comes in all colors of the spectrum, and it also comes in an array of finishes and coverages, so take the time to choose the perfect paint for your specific project. Paint also comes in all kinds of prices, and when it comes to paint, you really get what you pay for, so don’t reach for the least expensive paint you see. Often, the less expensive the paint is, the less pigment it has in it. If you opt for the cheaper paint, you might have to buy more of it and spend more time applying additional coats than if you buy a more expensive paint with high pigmentation that can cover in a single coat.
- Tool selection – Will a paint roller and a 4” brush be enough for your project, or will you need a paint sprayer for the job? You’ll need a ladder that is sturdy and safe, and will also likely need an extension to reach those especially high areas. Don’t forget the drop cloth, too, even though it’s an outdoor project. Paint will drip and spatter no matter what type of applicators you use, so protect all pavers, decking, and landscaping accordingly.
- Clean up – Clean up is the final stage of the project, but it still requires proper planning. Any paint chips that are scraped off will need to be vacuumed up with a shop vac, and any paint drips that miss the drop cloth will need to be wiped away or scraped off with a razor.
With the right planning, your exterior house painting job will be a great DIY project and a fun way to invest in your home in a hands-on way. However, if this type of project is beginning to sound daunting, messy, or like something you don’t want to get started on, you can find the best painting contractor in your area and trust the job to the pros.
The best Jacksonville FL painting company is The Painting Craftsmen, and we pride ourselves in our exterior painting service. Our technicians are highly trained and experienced and would love to get to work on your home. We specialize in giving smooth, even, beautiful coatings on wood, cedar shake, stucco, vinyl, and aluminum siding. Whether you live in downtown Jacksonville, the surrounding suburbs, or at the beaches, we are the best painting contractors in town, and the ones to trust with your home.
Faux painting and faux finishing are painting techniques that replicate the appearance of other materials. Faux finishes can emulate parchment and ancient fresco, fabric, porcelain, marble, stone, wood, and concrete, among others. The best part about incorporating a faux finish in your home, is that it creates a space that is 100% unique, and is akin to commissioning an artist to hand paint a piece of art just for you. It’s easy to see why a high quality faux painting job is so desirable among design-minded homeowners!
A faux finish will enhance any space, and there is a style for every type of home, whether you want to cover the walls of an entire room, or simply create an accent wall or highlight an architectural feature. Here are some of the most popular types of faux finish techniques:
- Chalkboard Paint – This trendy finish is perfect for homes with small children. Just as the name implies, chalkboard paint emulates a chalkboard, and kids can draw on the surface without damaging the walls. Many homeowners like to use chalkboard paint on a wall in the playroom, or even incorporate it onto a kitchen wall and use it to write grocery lists.
- Color Washing – In color washing, a base color is applied to the wall, and then one or more additional colors are applied over top of the base using a sponge, rag, or brush, creating layers of color and a gently textured appearance.
- Distressed Finish – The distressed look is popular on walls and furniture alike, and seeks to create the look of a well-worn, antique surface. The paint is applied evenly, and then removed or sanded down in select areas to create the feel of an old relic or collectible.
- Dry Brushing – The dry brushing technique begins with a coat of solid color, then subsequent coats of other colors, applied using a dry brush, in order to enhance the texture and create a softly etched look.
- Graduated Painting – In the graduated painting technique, one color is applied on one end of the wall, and a second color on the opposite end of the wall, and they are slowly and meticulously blended in the middle to create a seamless spectrum.
- Marbleizing – Marbleizing is a technique that requires high skill levels. Using multiple paint colors, a steady hand, and a keen eye for detail, a skilled painter can transform a plastic, wood, or plaster surface into one that looks like solid marble.
- Metallic Painting – Paint metallic paint onto your stove hood to make it look metal, or paint the wooden sides of your kitchen island with metallic paint to give your kitchen an ultra modern look.
- Ragging – As the name indicates, paint is applied to the wall using a crumpled rag, in order to create a complex yet uniform texture and look.
- Striping – A skilled painter can use painter’s tape, precise measurements, and an artist’s eye to stripe a wall. Stripes give the room a sophisticated and classic style, and can even create the feel of wallpaper. Of course, stripes can be as thick or thin as you want, and in any color combination imaginable.
- Strié – This technique is created by applying a solid color base coat to the wall, followed by a thicker coat of glaze in a different color. Once the glaze has been applied, a thick, dry brush is dragged lightly over the thickening glaze to create strong texture and soft streaks of color.
In nearly any type of faux finish method, though the finished product is breathtaking, the process is complex, and truly requires sharp skills. When a faux finish DIY project goes wrong, the results are excruciatingly bad. Fortunately, the best painting companies have highly skilled technicians who are extensively trained and able to create beautiful and natural finishes, using the right techniques and methods.
The Best Jacksonville FL Painting Company
Dreaming about a faux finish on your own walls? The Painting Craftsmen is the best painting contractor Jacksonville FL homeowners love and trust. Our clients in historic Riverside Avondale, Ortega, Orange Park, Jacksonville, and along the beaches love to incorporate faux finishing into their homes, and know that our painters will create masterpieces for them. Our faux finish team specializes in creating unique and high quality designs, customized to fit your vision and your home. When it comes to faux finish painting, The Painting Craftsmen is the best painting service and the one for the job!
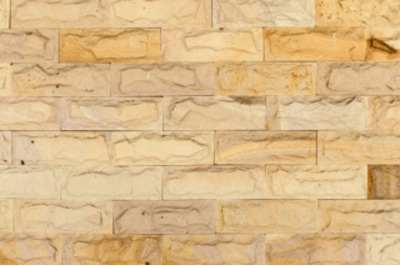 To paint over the brick or not to paint over the brick – that is the question. This question has divided homeowners, professional painters, and designers for many years. After all, painting over brick is a big decision, and once you do it, there’s almost no going back. If you’re wondering whether you should break out the rollers and dropcloths, check out our pros and cons list to help you make your decision.
PROS
- Appearance – Something about the current state of the brick around your home made you daydream about painting it. The entire facade of your home may be brick, or you may just have a brick feature, such as a fireplace. In any case, if you are tired of the way the brick looks, a coat of paint will do wonders for transforming its appearance! A coat of neutral-colored paint can turn a dated brick home into a modern one, and a coat of white paint over a dark brick fireplace can lighten up the entire room.
- Protection – Though brick is solid, it is still at the mercy of the weather, and can fade, corrode, and become damaged. Here in Jacksonville, harsh sunlight can fade bricks, excessive moisture can get trapped in their pores, and sand and salt can corrode them. A coat of paint can give a layer of protection to the brick, as long as you remember that once you paint the brick, it will need to be repainted every few years to maintain an effective level of protection.
- Maintenance – A painted surface is almost always easier to maintain than an unpainted surface, and brick is no exception. Brick is porous, and the pores can hold dirt, debris, and moisture. Therefore, brick that has been properly cleaned, prepped, sealed, and painted is easier to clean and in most cases, easier to maintain.
CONS
- Maintenance – In the case of painted brick, maintenance can be both a benefit of painting brick, and a drawback. Though a coat of paint will seal the pores of the brick and make the surface easy to clean, there are a few other things to consider. For example, once the brick is painted, it will need to be repainted approximately every 3-5 years. There is also the risk of moisture buildup. Certain types of coating can reduce the ability of the brick to expel moisture, thus trapping the moisture in the bricks. Moisture must be allowed to escape, otherwise cracks will appear in the bricks, and they will become damaged, sometimes irreparably.
- Brick quality – The quality of the brick may determine whether or not you can paint it. For example, brick that is chipping, deteriorating, overrun with mold or mildew, or otherwise in poor condition will not make a good surface for painting. Paint will not properly adhere in the first place, and as the bricks continue to deteriorate, so will the paint.
- Prep work – Painting over brick is touted as a simple DIY project, and this is true, provided you are a seasoned DIYer, and well-versed in complex painting projects that require much prep work. First, you’ll need to thoroughly clean the surface, most likely using pressure washing, along with high quality cleaning solutions, targeted toward your home’s unique needs. For example, if mildew is a problem around your home, it won’t be enough to pressure wash; you’ll also need to use the right mixture of chlorinated cleaning solution to combat the mildew. Be aware also that there are many different kinds of brick, each requiring a chemically compatible approach. Then, the brick must be allowed to thoroughly dry, which can take up to several days. Otherwise, moisture will become trapped inside the brick and cause the subsequent paint to bubble or peel. All cracks and mortar issues must then be addressed, and any crumbling bricks will likely need to be replaced in order to ensure that the final coat of paint is appealing and effective.
- Specialty skills – Prepping and painting brick requires specific and finely tuned skills. Paint drips along the crevices in the mortar, and you’ll need to have a keen eye to watch for these drips and correct them. Different types of rollers and brushes and paint formulations are required of different brick painting projects, and for this reason, most homeowners choose to find a good professional painting contractor to do the job.
- Permanence – Once a brick surface is painted, there is almost no going back. It would be incredibly expensive and time consuming to attempt to remove paint from brick, and the results would most likely be undesirable. Brick absorbs paint into its pores, and it is impossible to remove it completely once it has been applied.
The Best Painting Service Jacksonville FL
There are many good painters in Jacksonville FL, but The Painting Craftsmen takes pride in being the best professional painting service in the region. We specialize in applying high quality topcoats to exterior surfaces, including wood, vinyl, aluminum, cedar shake, stucco, and yes – brick, too! Painting brick is a headache for most homeowners, but not for us. We take care of everything, from the pressure washing and caulking, to the paint application itself. The Painting Craftsmen is known for our friendly and highly skilled technicians, our high quality paint and materials, and our passion for creating beautiful surfaces with long-lasting results. Find out for yourself why The Painting Craftsmen is the best painting company Jacksonville FL homeowners love and rely on!
« Previous Page — Next Page »