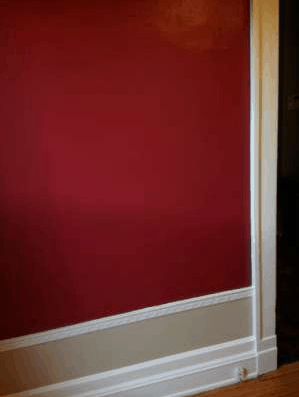
Crisp, beautiful trim, with clean, straight edges is one of the hallmarks of a truly great paint job. Homeowners who choose to tackle house painting as a DIY project often fear the task of trim painting, but don’t be afraid — our tips will having you painting trim like a pro!
What you need:
– Sandpaper (most likely 100-120 grit)
– Spackle and spackling knife
– Painter’s tape
– Sponges and clean cloths
– Dropcloth
– Paint trays, paint sticks, and brushes
– Paint (a high quality interior primer and a high quality interior latex paint)
Step 1: Clean
The first step in nearly every painting project is to clean the surface, and trim is no exception. Wipe away dust and cobwebs with a clean cloth, and wipe grime and buildup using a damp sponge. If you skip this step, the primer and paint may not adhere well.
Pro tip: When cleaning and prepping, as well as when painting, work from the top down. This will help you control the dust during the cleaning and prep work, and will allow you to paint over any spatter or spills that occur during painting.
Step 2: Sand
Sand all trim surface. Even if the trim is new, you may want to use a 120-grit paper or block to lightly sand down the shine. After sanding, use a damp cloth to wipe away the dust.
Step 3: Repair
Use a spackling knife to fill all gouges, dents, and cracks with a lightweight spackling compound. When the compound has completely dried, sand the area and again wipe away the dust.
Step 4: Tape
Use painter’s tape to mask off the wall. Use long pieces of tape (e.g. 6–8”), and use the spackling knife to press the tape firmly. This will prevent the paint from bleeding through the tape.
Step 5: Primer
Apply your primer to the trim. Allow it to dry for a full 24 hours. Once dry, if you see spackle, bare wood, etc., apply a second coat of primer to those areas.
Step 6: Topcoat
Apply topcoat, including a second coat, as needed. Pull up the painter’s tape before the paint has fully dried, in order to avoid pulling up flecks or chips of paint.
Pro tip: In order for your trim paint to stand out against the wall paint, choose a slightly glossier finish than the wall paint finish. For example, if your walls are satin, choose a semi-gloss for the trim, and if your walls are semi-gloss, choose a higher gloss paint for the trim.
The Best Painting Contractors Jacksonville FL
At The Painting Craftsmen, we specialize in interior painting, from the crown moulding to the baseboards, and everything in between! There is an art to painting, including trim painting, and our technicians are expertly trained in the techniques needed to achieve the best possible results, time and time again. Homeowners throughout the First Coast – from Fernandina Beach to Jacksonville to St. Augustine – know that The Painting Craftsmen is the best professional painting company and the team to trust with their homes.